MBot Setup: Installing the OS
To configure a new robot, you must first flash a new SD card with the robot’s image.
Students: Check with your instructor for the correct image download link.
Prerequisites
You will need:
- A way to read and write to a Micro SD card (you can use a laptop with an SD card slot or a USB adapter),
- An MBot Raspberry Pi OS image.
Download an MBot image:
Which image should I use? The “Full” images have all the MBot code installed, so you can start driving, making maps, and programming your robot out of the box! The “Base” image has no MBot code on it. You will need to setup the image with any code that you need.
Looking for old images? Access all available images here.
Note Classic Full Image coming soon!
Instructions
To install the OS image on the SD card, follow these instructions:
- Download the image. This might take some time because the file is large. Make sure you have about 4GB available.
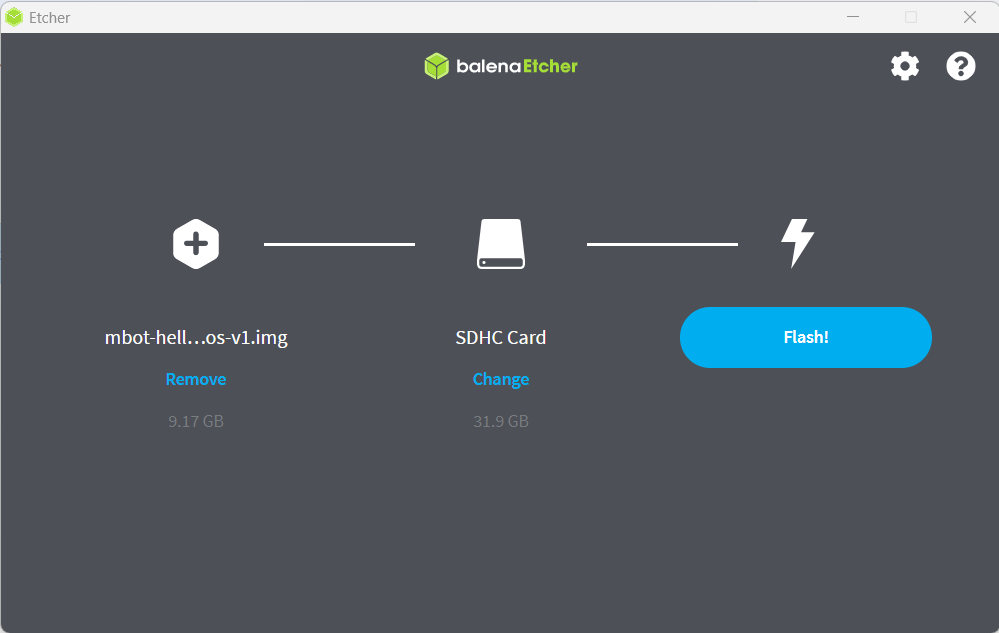
- Download Balena Etcher. This is a tool for flashing OS images onto SD cards.
-
Flash your SD card. Launch Etcher and insert the SD card into your laptop.
Tip: If you are using an SD card adapter, ensure that the switch on the adapter is not in “Lock” mode, which will make the SD card read-only.
Select the correct device from Etcher, and navigate to the image you downloaded. Then press “Flash!”. This process can take up to 30 minutes.
Flash failed? If the flash is not successful, trying a second time might fix it. If it continues to fail, you can try another SD card.