MBot Setup: Flashing the MBot Control Board
The MBot Control Board uses a Raspberry Pi Pico microcontroller for its processing. You can flash firmware onto the microcontroller in order to program it.
The main MBot firmware for the supported hardware, as well as calibration and test programs, are available on the Firmware GitHub page.
Flashing Firmware
To flash the firmware onto the MBot Control Board, either download the firmware file to the Raspberry Pi, or compile it from the source code. The firmware file will have a .uf2 extension.
1. Manual Boot Mode
For the mbot-upload-firmware script to flash new firmware, the Pico must be in BOOTSEL mode. To do this, follow these steps:
-
First, ensure that the white/green jumper wires in the image are disconnected from your Pico.

-
Locate the “BOOTSEL” and “RST” buttons on the board (short for “Boot Select” and “Reset”).
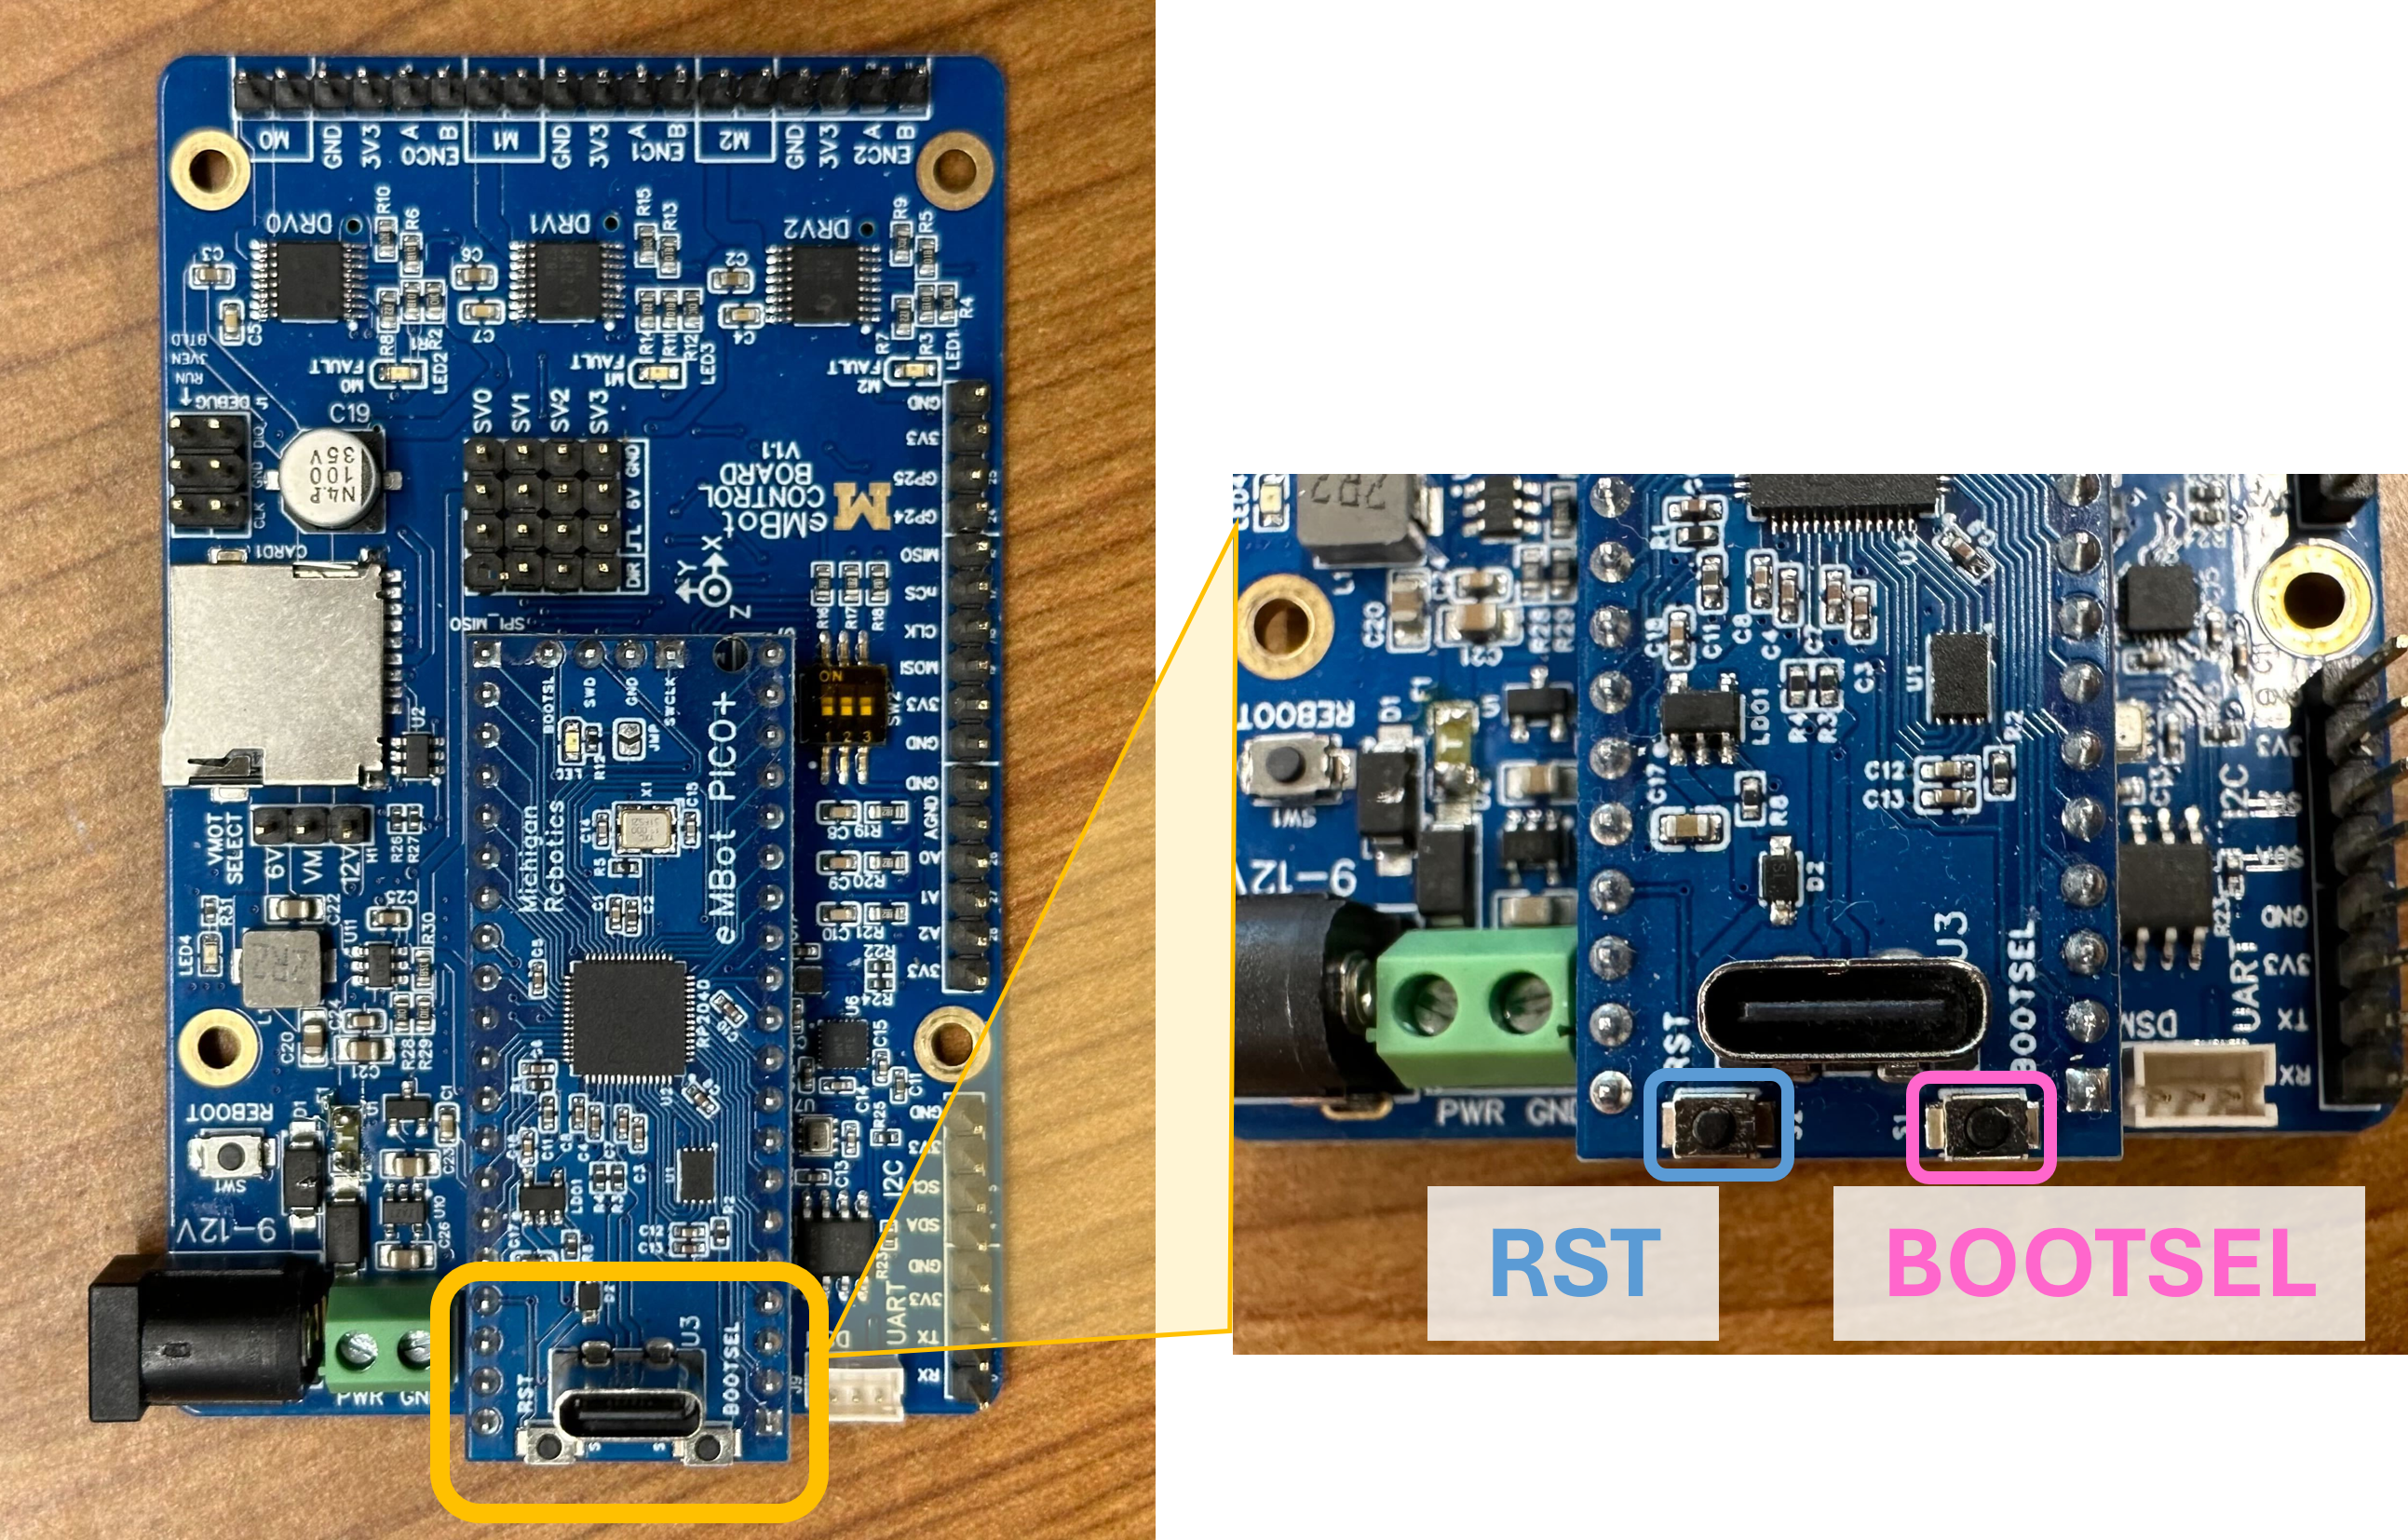
- Hold down both “RST” and “BOOTSEL”
- Release “RST” then “BOOTSEL” to put the board into flashing mode.
Tip: Make sure to always manually put the Pico in BOOTSEL mode before flashing the Pico with the mbot-upload-firmware script.
2. Flashing the Firmware
From a terminal on the MBot’s Raspberry Pi, do:
sudo mbot-upload-firmware flash <MY-FIRMWARE>.uf2
replacing <MY-FIRMWARE> with the name of the firmware file you downloaded. If you compiled from the source code, the file should be located in the build folder.
Getting an error? If you see a message that says No accessible RP2040 devices in BOOTSEL mode were found when you run the script, you need to manually put your Pico into boot mode before you run the command.
Getting an error even after putting the Pico in boot mode? Read through the Automatic Boot Mode section.
Note: The mbot-upload-firmware script is installed as part of the MBot System Utilities. If you don’t have it, install it from mbot_sys_utils.
Automatic Boot Mode
The mbot-upload-firmware script has the ability to automatically reboot the Pico in BOOTSEL mode. If this is enabled on your robot, you can flash the firmware, without first manually pressing the buttons on the board, with the same command:
sudo mbot-upload-firmware flash <MY-FIRMWARE>.uf2
replacing <MY-FIRMWARE> with the name of the firmware file you downloaded. If you compiled from the source code, the file should be located in the build folder.
Is automatic boot mode enabled on my robot?
To use automatic boot mode, the appropriate pins on the MBot Control Board need to be connected to the Raspberry Pi. This picture shows the connection on the MBot Control Board that is required (the white and green wires):
Warning: Automatic boot mode is in beta mode, and may not always work. If you have the correct cable but still get an error, unplug the connector with the white and green wires from the MBot Control Board and use the manual boot method.
Tip: If you tried all the tips above and are still having trouble, try manually flashing the firmware.
Manually Flashing Firmware
You can also flash the firmware manually, through the Raspberry Pi desktop (e.g. through NoMachine), or from a laptop connected to the MBot Control Board through USB.
To manually flash firmware, you will need the firmware downloaded onto the device you are flashing from (the Raspberry Pi or your laptop). Then, follow these steps:
- Put the Pico into BOOTSEL mode.
- The Pico should now show up as a device in the file explorer as a USB device (see Raspberry Pi below).
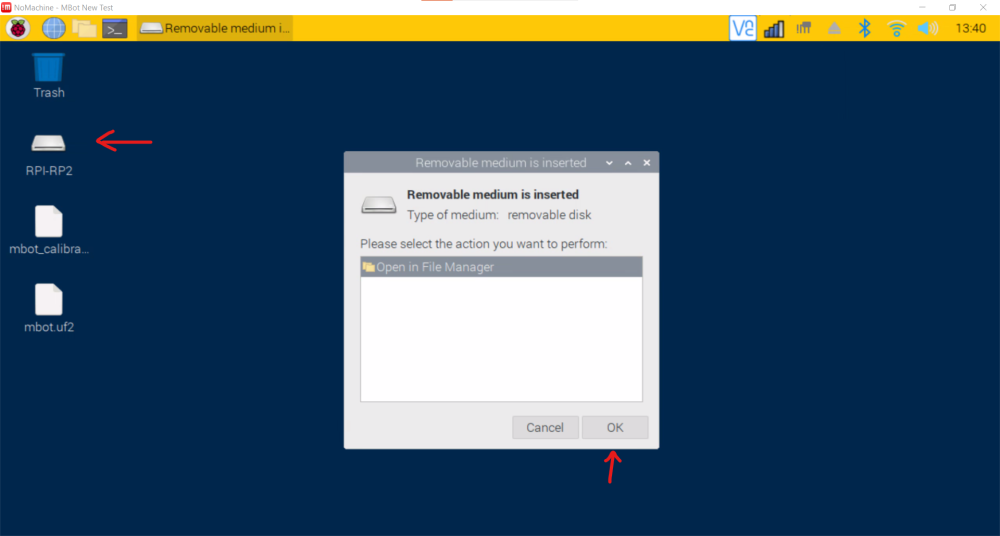
- Open the USB device in the file explorer.
- Drag and drop the firmware you want to flash (it should end with a
.uf2extension) into the folder. The Pico will reboot automatically, and will then run the script you flashed.