MBot Setup: Calibrating & Flashing
Each robot needs to be individually calibrated in order to control it. Once it’s calibrated, the firmware can be flashed onto the robot. You will need to flash programs onto the Pico to calibrate and load the firmware onto your robot.
1. Download the Firmware
First, download the correct firmware type for your MBot. You will need to select the type (if you aren’t sure which type of MBot you have, see Hardware) and some details on the configuration. Use the selector below to pick your type, then download the correct firmware files.
Or, on the robot, type:
wget [MAKE A SELECTION]
wget [MAKE A SELECTION]
To get the tests:
wget https://github.com/mbot-project/mbot_firmware/releases/download/v1.2.0/mbot_encoder_test.uf2
wget [MAKE A SELECTION]
Looking for old firmware versions? Access past releases here.
What’s my encoder resolution?
There are three possible encoders, each with a different resolution. Check the back of the motors on your MBot to determine which one you have.
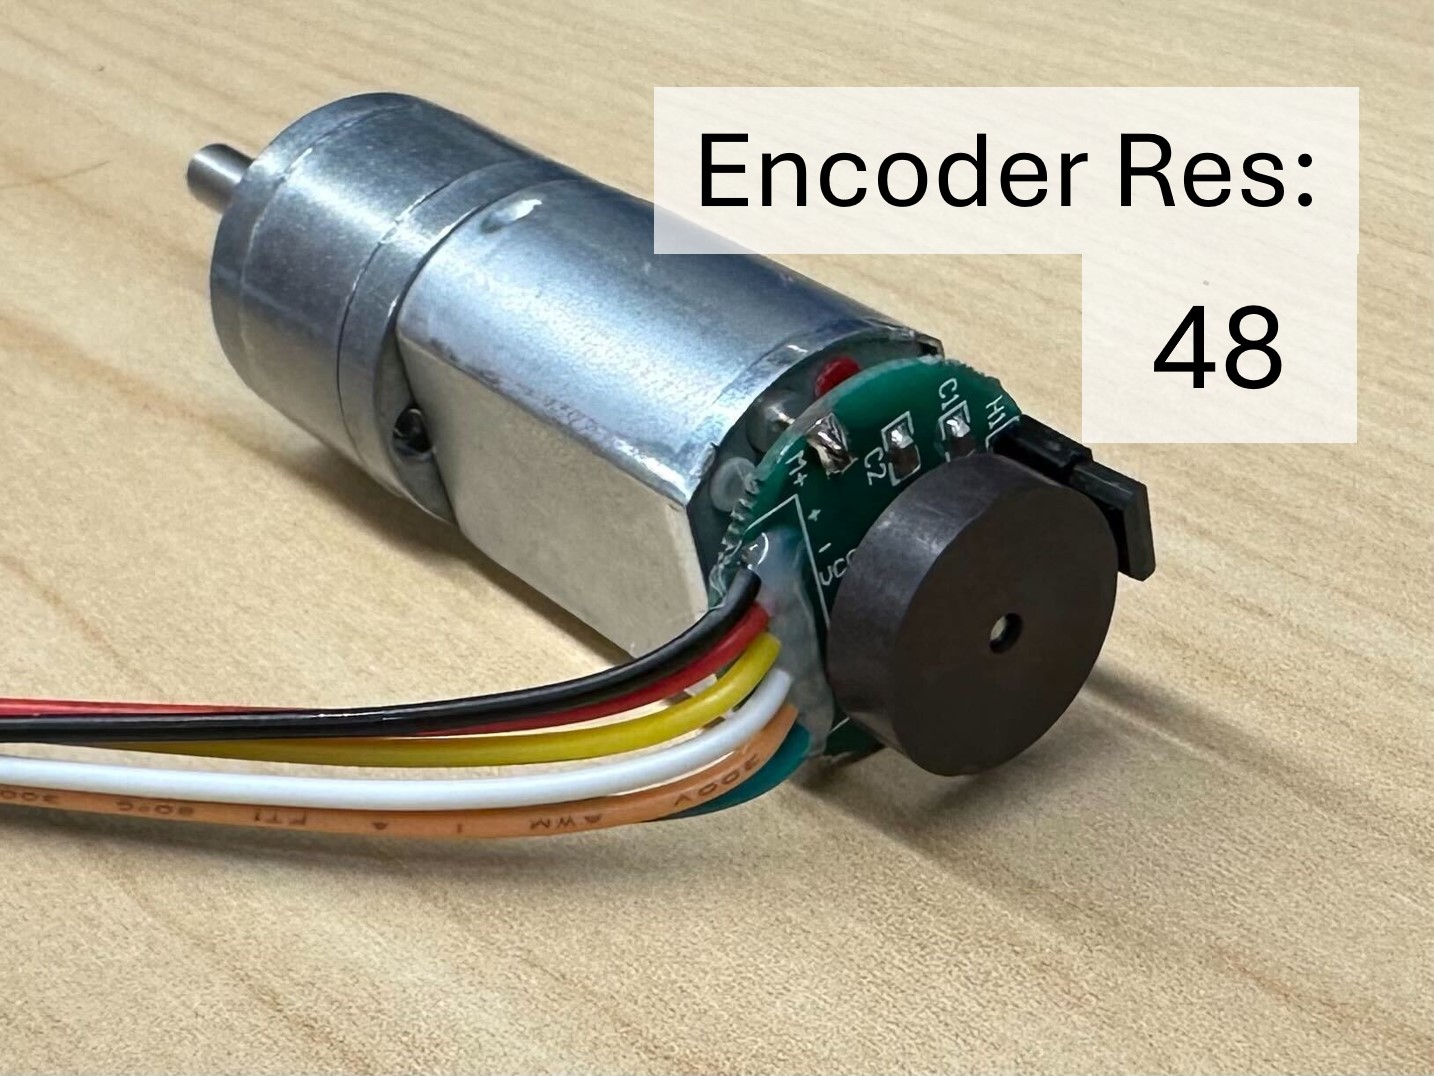
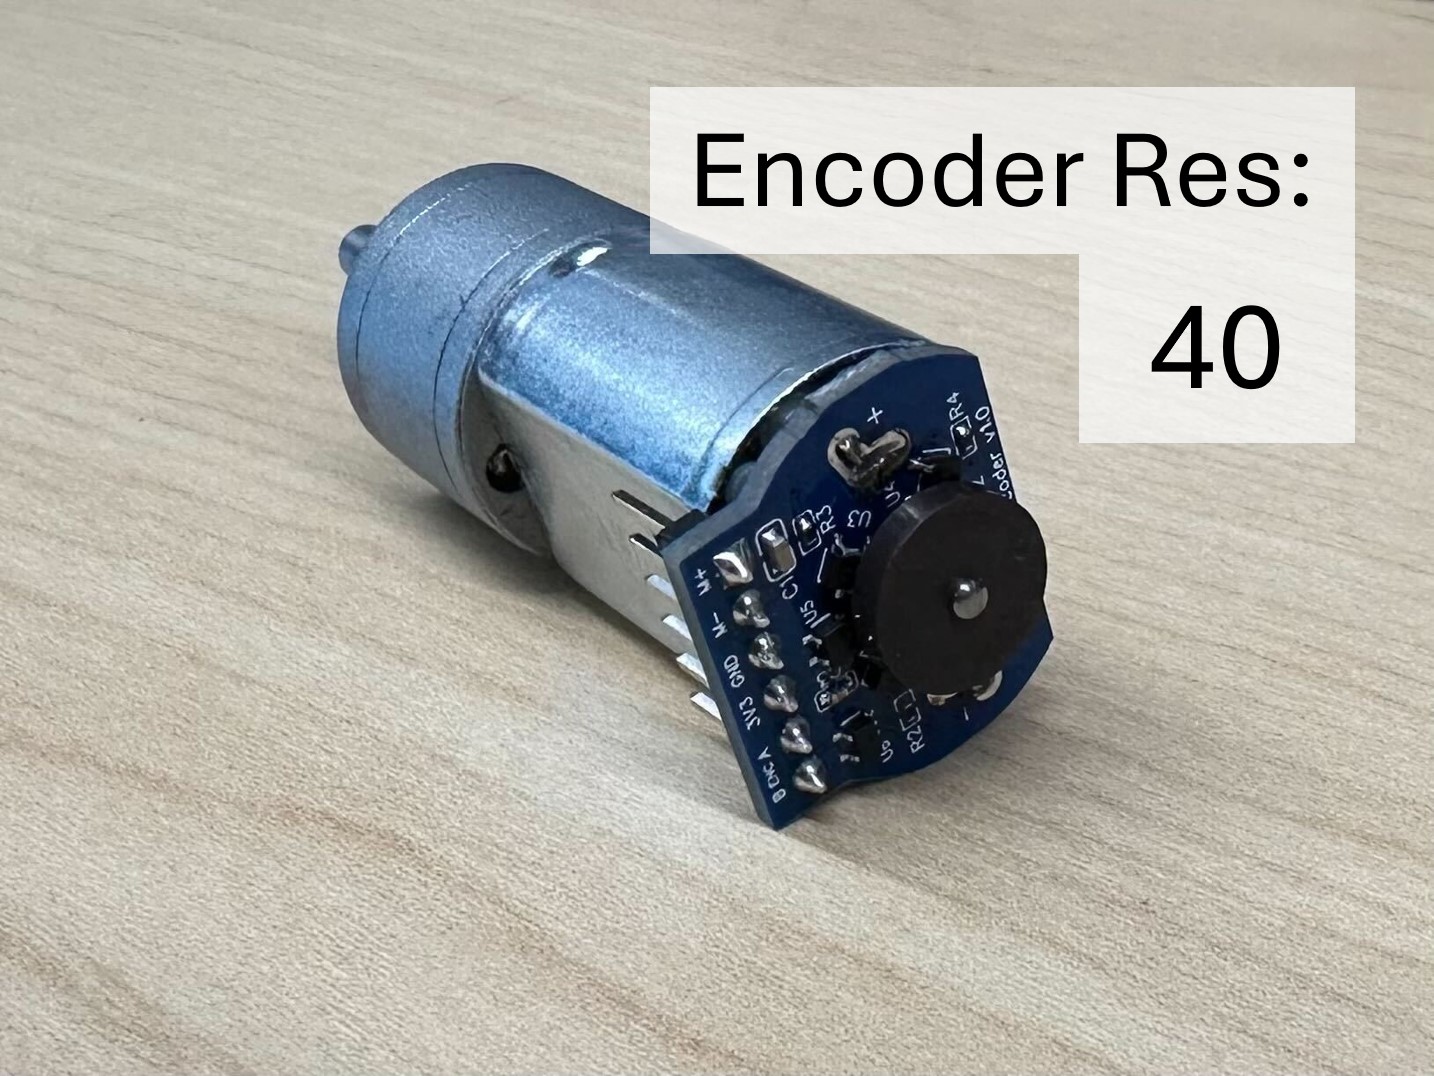
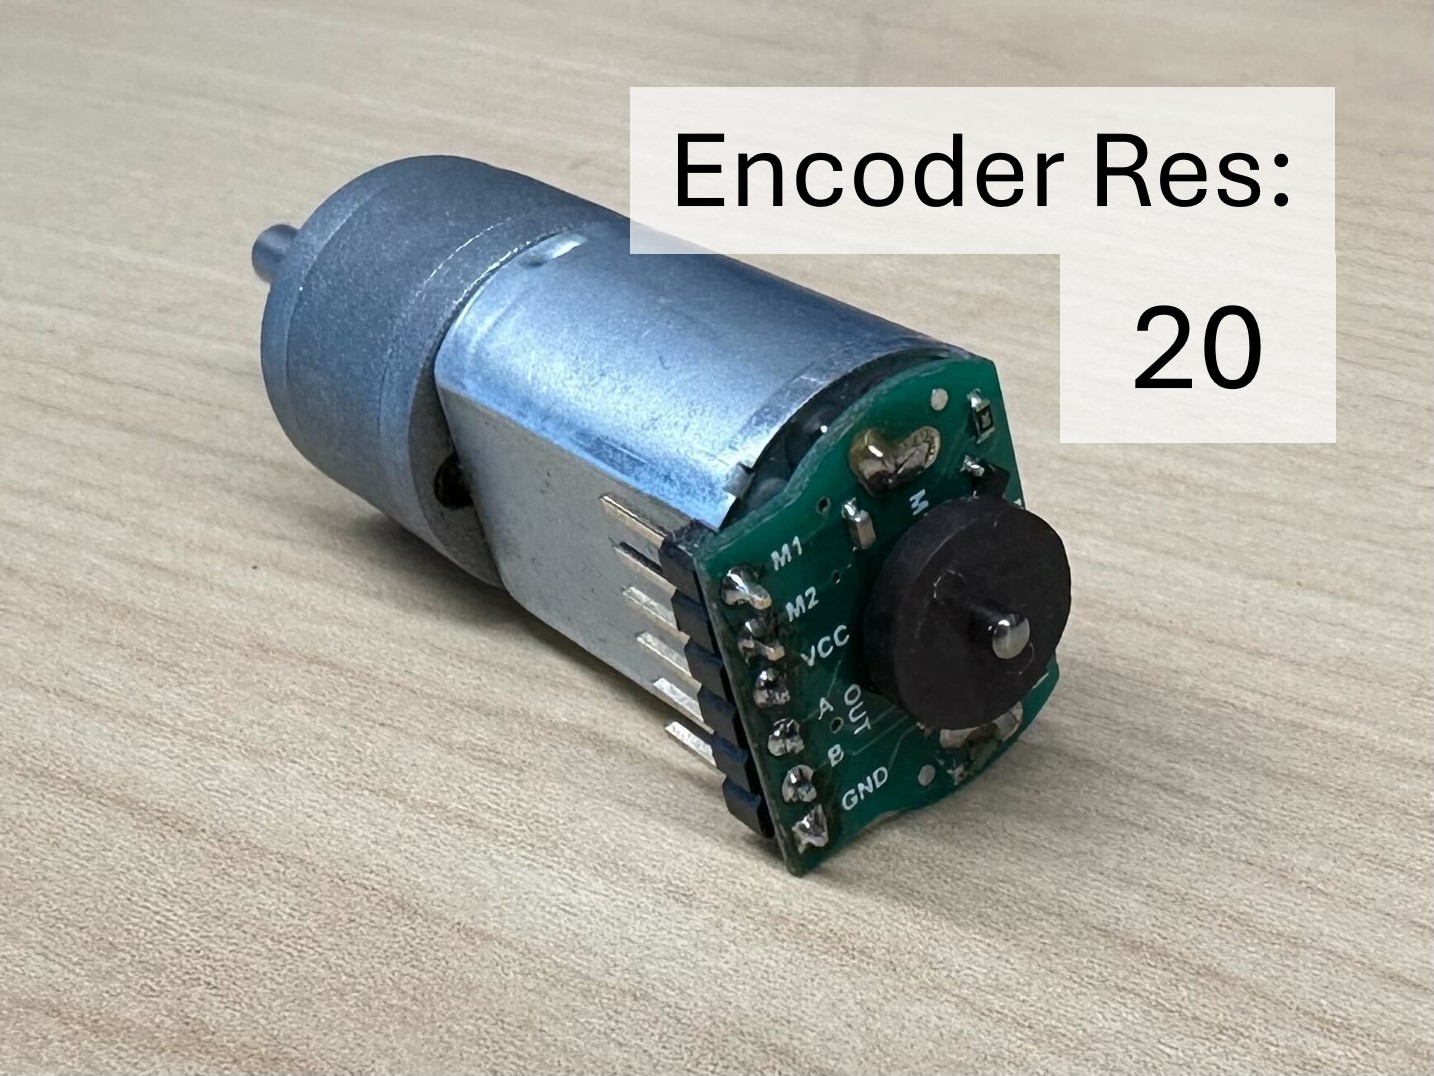
Tip: The encoder with resolution 48 has a sensor protruding perpendicular to the board. The encoder with resolution 40 has a blue board, while the encoder with resolution 20 has a green board.
2. Calibrate the MBot
We will now flash the calibration script onto the Pico to calibrate it before we flash it with the firmware.
The calibration script detects the motor and encoder polarity and then calibrates the motor coefficients. The robot will move around for this step so you will need clear space on the floor (preferably on the same type of surface that you plan to use the robots on).
Manual Flashing Mode
Before we flash the robot, we must put it in flashing mode. To do this, follow these steps:
- Locate the “BOOTSEL” and “RST” buttons on the board (short for “Boot Select” and “Reset”).
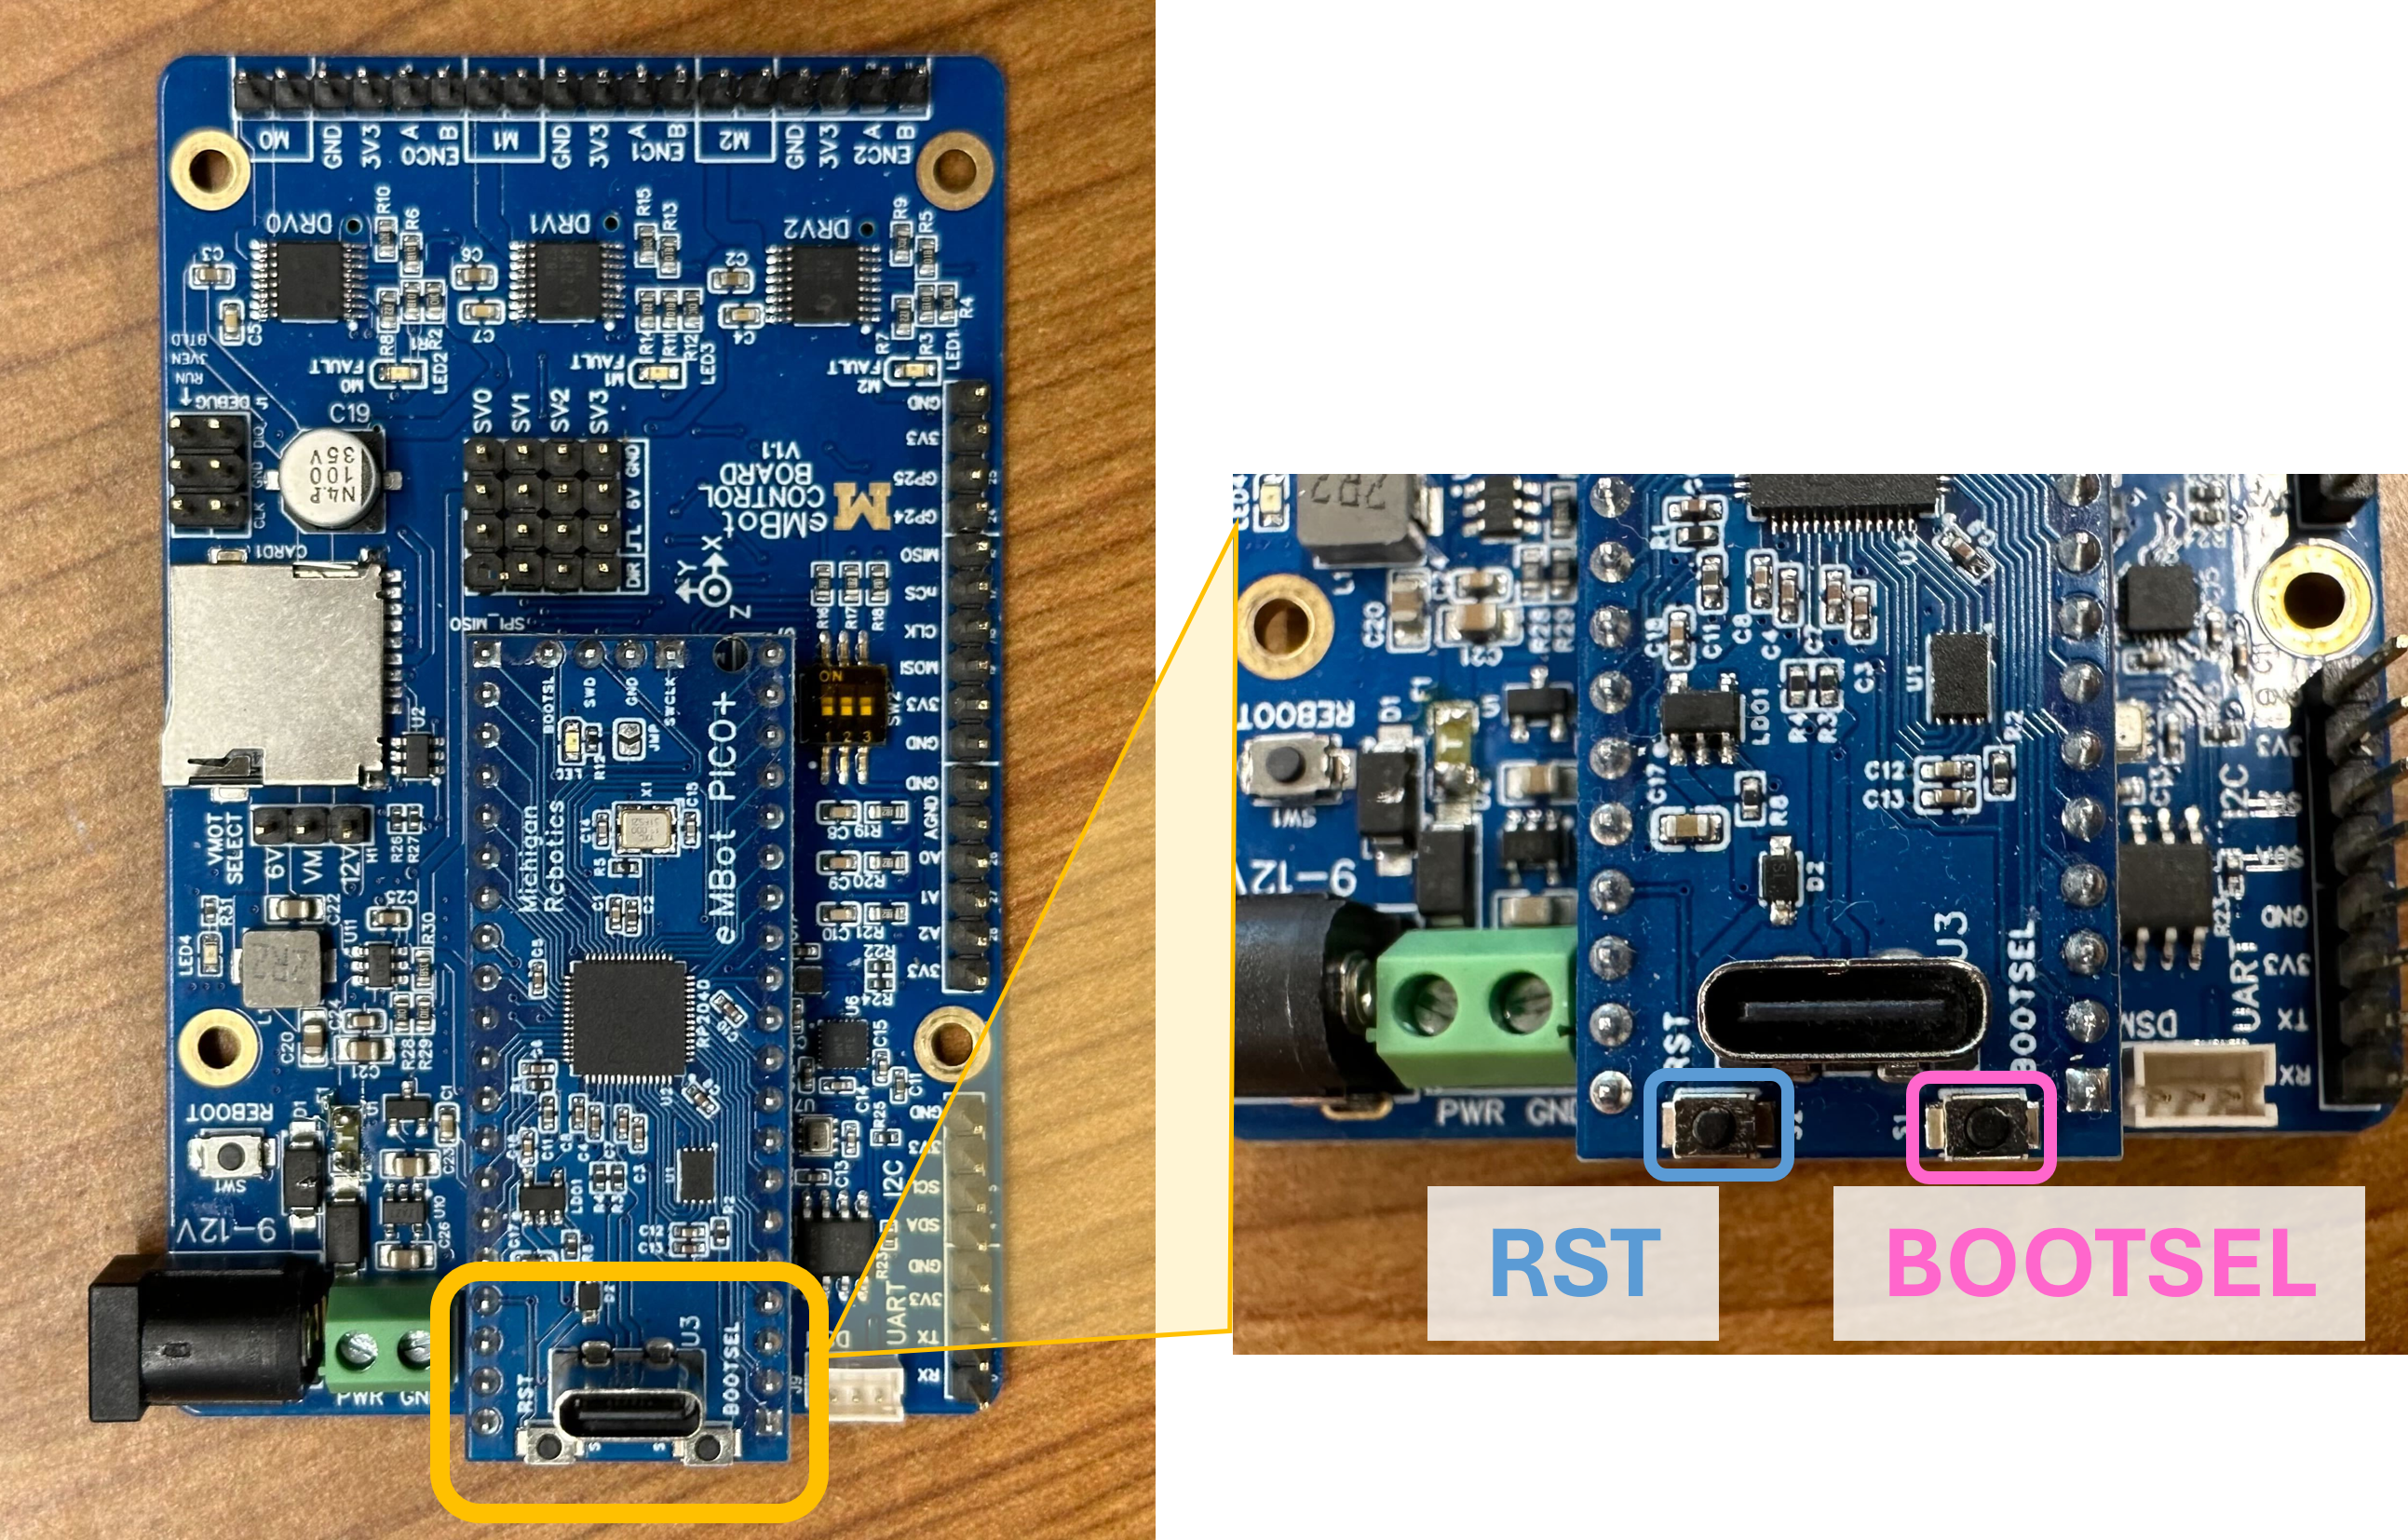
- Hold down both “RST” and “BOOTSEL”
- Release “RST” then “BOOTSEL” to put the board into flashing mode.
Can I skip this step? Some robots may be able to automatically put the robots in flashing mode, so the above step can be skipped. Read through the guide on Automatic Boot Mode to find out more.
Flashing the Calibration Code
Warning: Do not run the calibration script with the MBot on a table!! Before you run the command below, place the robot on the floor with some space around it.
To calibrate the robot, with the robot in flashing mode, do:
sudo mbot-upload-firmware flash mbot_calibrate_<TYPE>.uf2Got an error? If you get the error: No accessible RP2040 devices in BOOTSEL mode were found you may need to manually put the board into Flashing mode before you run the above command.
Still getting an error? You may have a problem with Automatic Boot Mode. See that guide for troubleshooting tips.
The Pico will reboot automatically, and will then run its calibration routine. Don’t touch the robot while it does this procedure. The calibration procedure looks like this for the Omni robot:
3. Flash the Firmware
Flash the MBot Firmware onto the Pico. The calibration script will have saved parameters onto the Pico’s memory. We can now flash the firmware that will run on the Pico during operation.
Put your board in boot mode: If you needed to manually put the board in flashing mode during calibration, you will need to do this again before running the next command. See the manual flashing instructions above.
To flash the MBot Control Board with the firmware, do:
sudo mbot-upload-firmware flash mbot-<TYPE>.uf24. Test your Setup
Your robot is ready! Drive the robot to make sure your firmware is working as expected.
Something not right? If your robot doesn’t drive properly, you may have a hardware issue. See the debugging tips to check for hardware issues.
Previous Step: Configure your image Next Step: Test your setup!